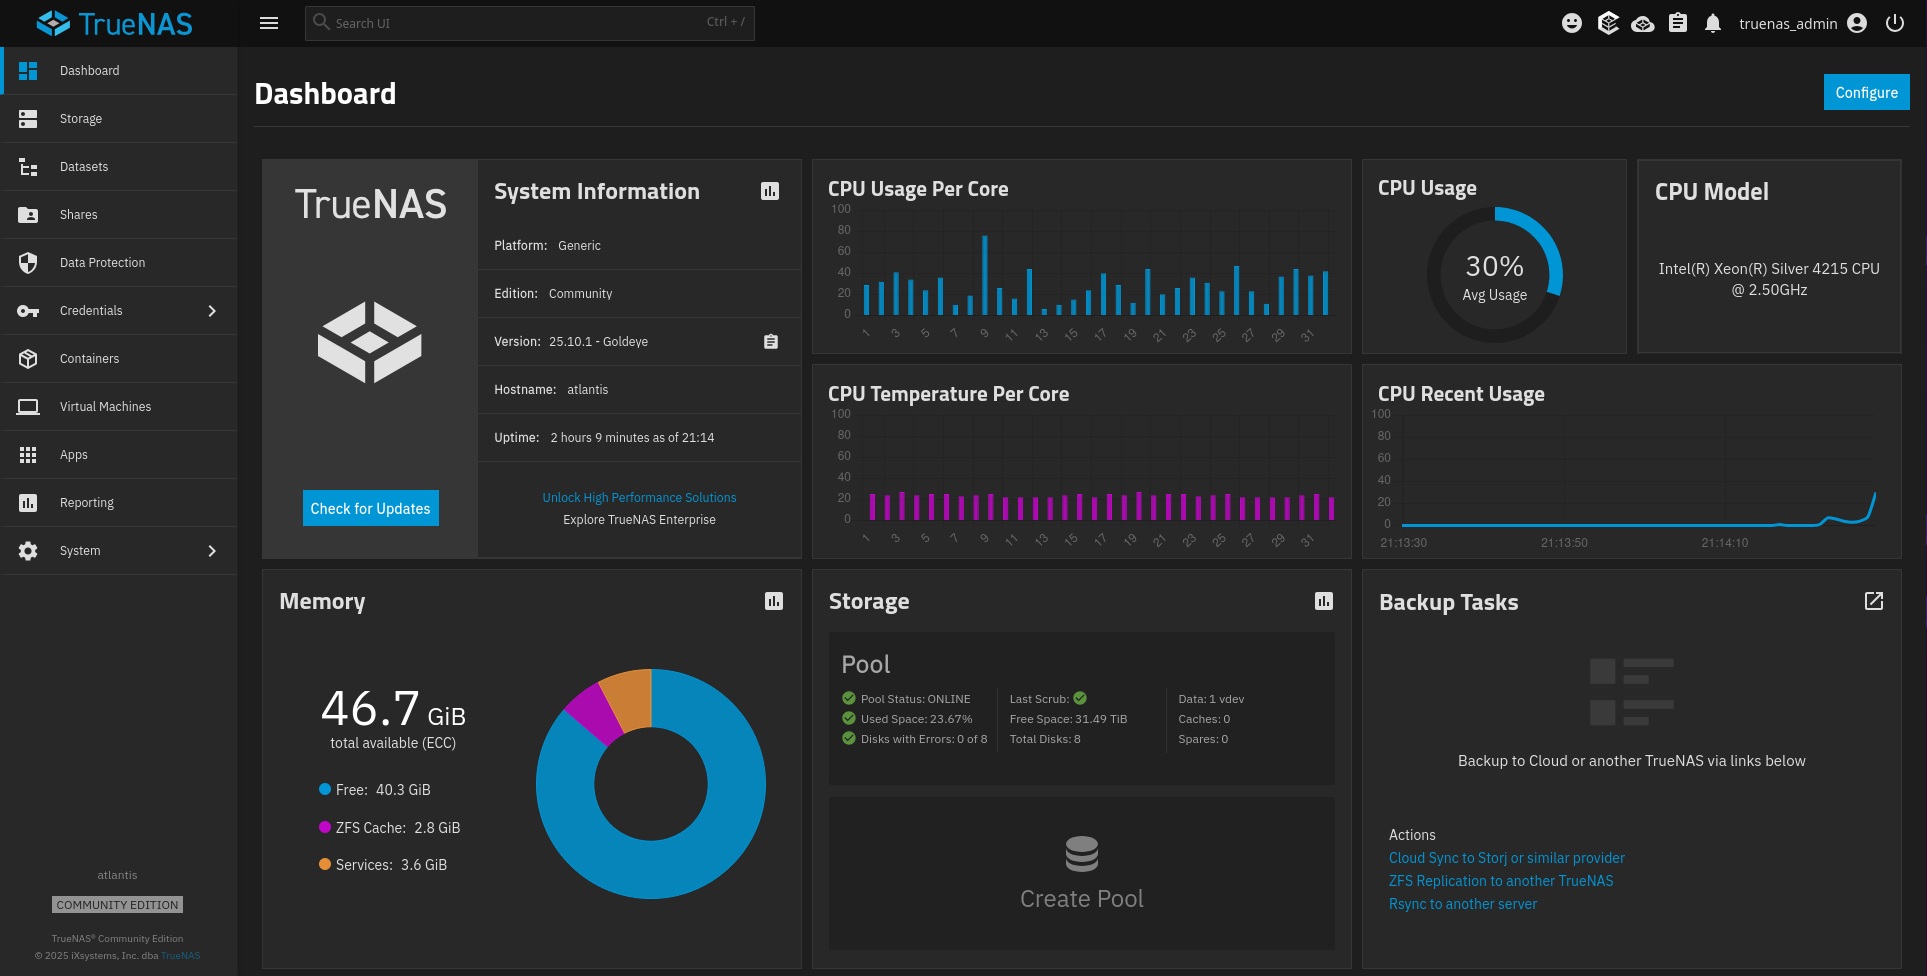
I mentioned in my previous post that I had setup my friend and I’s servers with three distinct datasets: Data, Media, and Backup. Data was created as a dataset where all our personal documents would be stored. Media was created as a dataset for movies and music, which don’t require an offsite backup. This is where I put my collection of movies and series that I’ve ripped and make available to Plex. Backup is the offsite backup dataset. This is where my cloud servers backup, as well as as where our backups of each other’s Data dataset lives. Now, to be honest, I didn’t setup encrypted datasets on our servers, as I’ve not done it before and this data is too important to me to take a chance. Someday I’ll toy with it and learn that aspect of TrueNAS...
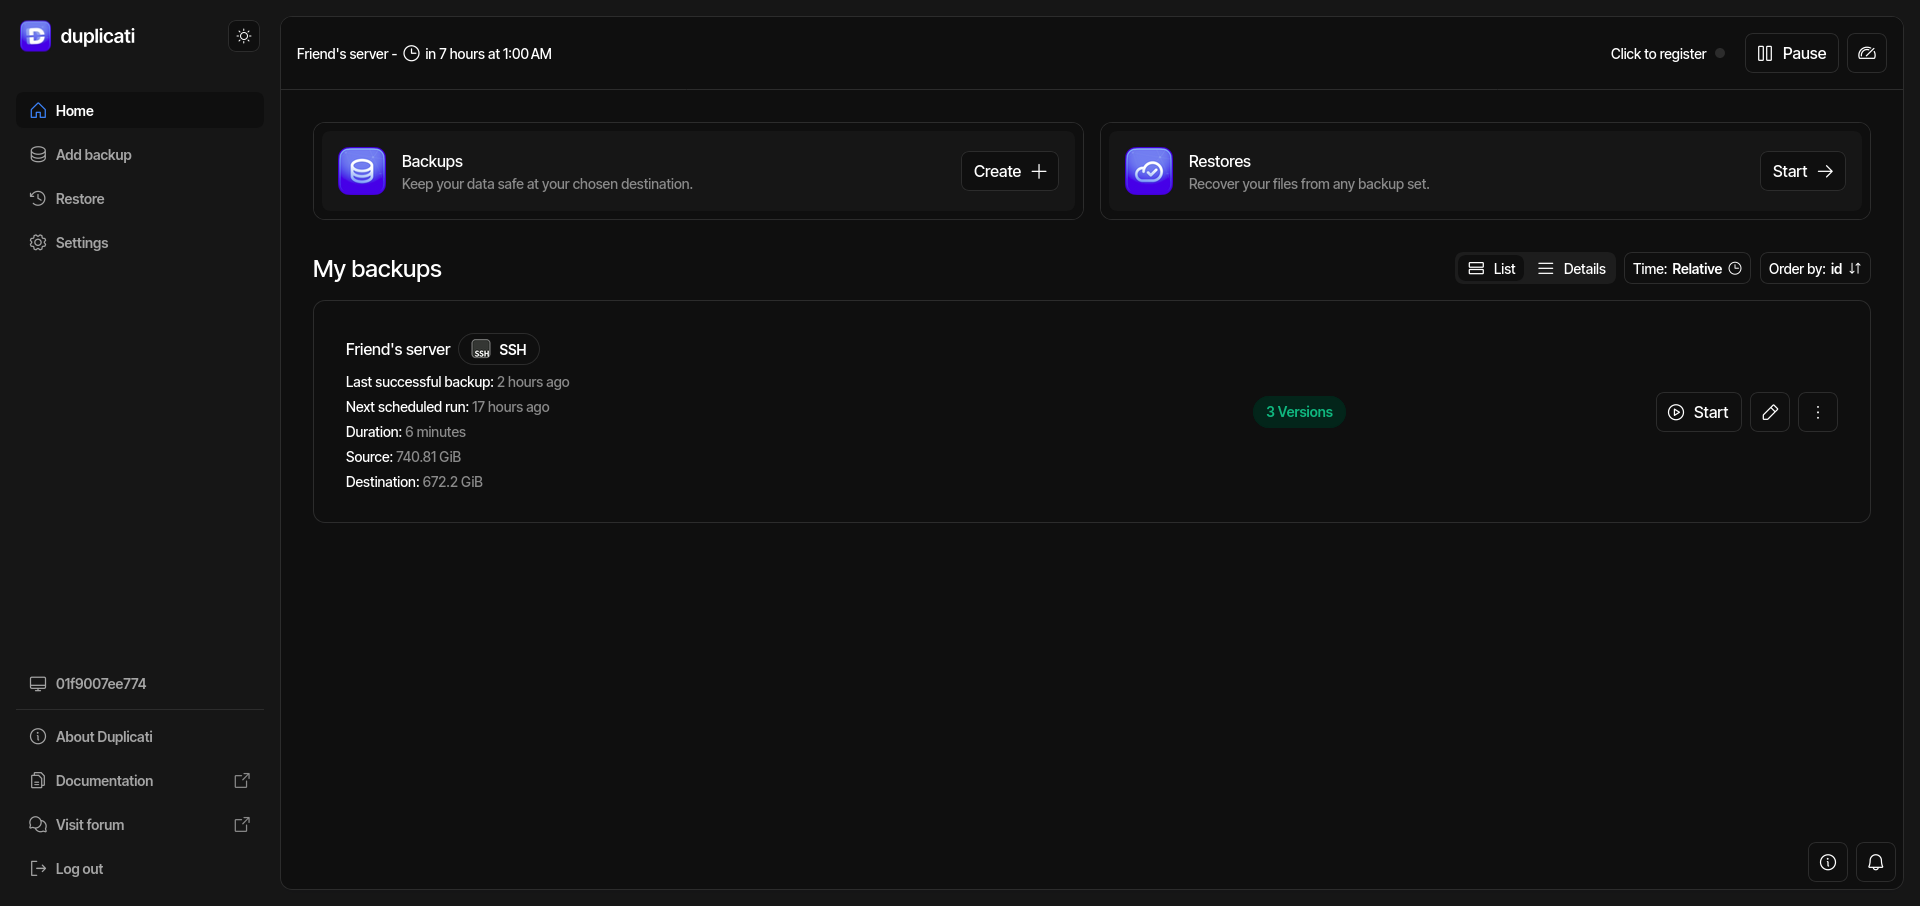
Getting Started with TrueNAS: Buddy backups with Duplicati
read more...